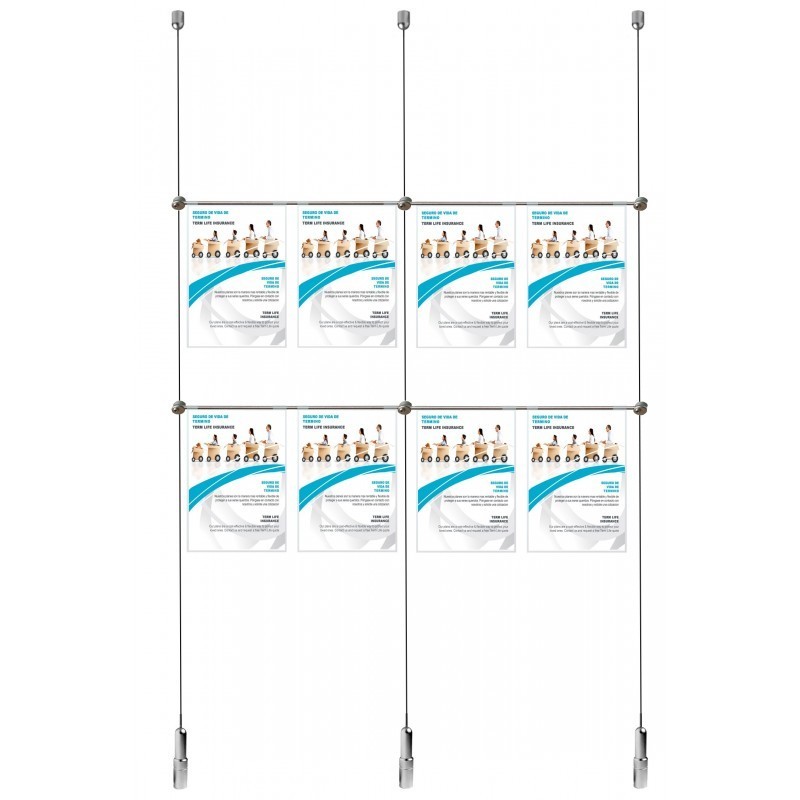
This discreet and easy-to-use cable system is not just a display; it's a versatile tool to enhance merchandising,...
-
Picture Hanging
-
Wall Picture hanging
- Clip Rail Hanging System
- Heavy Duty J Rail Hanging System
- CLIP-RAIL SMART HEAVY DUTY
- Victorian Moulding
- J Rail Max Hanging System
- Clip Rail MAX Hanging System
- CLIP-RAIL PRO EXTRA HEAVY DUTY
- Mini Rail Hanging System
- Paper Rail Hanging System
- Plaster Rail system
- Deco Rail Picture Hanging System
- Picture Frame Security Fixings
- Picture Hanging System Kits
- Steel Chain Picture Hanging
- Rug & Coverlet Hanging kit
- Brass Rod Rail Hanging
- Sliding Picture Rails
- Magnet Hanging (Store Dispaly Supplies)
- Ceiling Systems
- Picture Rail Lighting System
- Sets: Art Gallery Systems
- Heavy Duty Picture Hanging & Mirror Hanging Kits
-
Wall Picture hanging
- Display Easels
- Cable & Rod Displays
-
Shelves
- Browsers & Sleeves
-
Others
Latest posts
-
 What is the best way to display posters? The Ultimate Retail Display Solution - A Guide for Store OwnersRead more
 -
 How to Use the Brass Cylinder Hook for Picture Hanging Wire System09/12/2025Read more
Detailed Guide: Using the Brass Cylinder Hook for Picture Hanging This guide will walk you through everything you...
-
 The Wooden Charpai: A Traditional Woven Bed of the Asian Subcontinent (Now Available in UK)06/10/2025Read more
The Charpai, also known as Charpaya or Charpoy (چارپائی), is a traditional woven bed that holds a significant place...
-
 How to Hang a Painting or Mirror on a Wall ? Using a Heavy Duty Mirror Hanging Kit06/03/2025Read more
Hanging large artwork or mirrors can seem intimidating, but with the right hardware and method, it becomes a simple...
-
 Understanding Listed Buildings in the UK: Grades & Rules05/23/2025Read more
Listed buildings are an essential part of the United Kingdom’s cultural and architectural heritage. If you’re a...
-
 Why Professionals Choose Picture Hanging Systems Over Traditional Wall Hooks or Nails05/23/2025Read more
In the world of art display, presentation matters just as much as the artwork itself. Whether you're curating a...
-
 Want to hang tapestry using picture hanging rail?03/26/2025Read more
Tapestry is a form of textile art traditionally woven by hand on a loom. It involves creating intricate designs or...
-
 How to Use Your Foldable Wooden Easel (Tripod Studio Art Stand) - Buyer Guide12/17/2024Read more
The easel is made from solid beech wood, designed for durability and versatility. It's perfect for artists,...
-
 How to Hang a Transparent Acrylic Poster Holder Using a 3meter J Rail Display System12/09/2024Read more
If you want a clean, professional way to display posters, brochures, or samples, the 3m J Rail Display System with...
-
 Hanging Pictures Using Gallery Rails without the Need for Nails04/06/2024Read more
Utilize high-quality gallery rails for sturdy support without the need for nails. Arrange artwork thoughtfully, using...
Blog categories
Search in blog
How to Hang a Painting or Mirror on a Wall ? Using a Heavy Duty Mirror Hanging Kit
Benefits of Using Flush Mount Picture Hanging Systems
Using a Heavy Picture & Mirror Hanging Kit makes it easy to safely hang large artworks and mirrors with a clean, professional appearance. Its flush-to-wall finish and concealed hardware provide an elegant solution for home, gallery, or office use. With the right tools and careful alignment, you’ll achieve a secure and stylish display in no time.
Enhanced Safety and Stability
Heavy artwork and mirrors pose a risk if not properly secured. Flush-mount hanging systems use durable wall hooks, D-rings, and wall anchors to ensure the piece is firmly attached to the wall, minimizing the risk of accidents from falling or shifting.
Clean, Professional Appearance
Unlike traditional hanging wires or visible brackets, this system is completely concealed behind the frame, creating a sleek, flush-to-wall finish. This clean aesthetic is ideal for modern homes, offices, and galleries where presentation matters.
Even Weight Distribution
By using two strap hangers (D-rings) placed symmetrically on the frame, the weight is evenly distributed across the wall, reducing stress on a single point. This helps prevent warping, tilting, or long-term damage to both the frame and the wall.
Versatility Across Wall Types
This hanging system is compatible with plasterboard, solid brick walls, and wooden surfaces, making it a go-to solution for nearly any environment. The included wall plugs and screws provide adaptability for different wall materials.
Long-Term Durability
Flush-mount kits are designed for heavy-duty use, supporting mirrors, canvas artwork, and large photo frames without degradation over time. The strong metal fittings and secure fastenings ensure your display remains in place for years.
Step-by-Step Hanging Guide
Step 1: Prepare the Frame
-
Position the Strap Hangers (D-Rings):
-
Measure and mark about 1/3 down from the top of the frame on both sides.
-
Align the D-rings vertically or at a slight inward angle.
-
Screw them into place using the small screws provided.
-
✅ Ensure both D-rings are at equal height for level hanging.
Step 2: Mark the Wall
-
Hold your frame or mirror against the wall where you want to hang it.
-
Use a pencil to lightly mark the top edge and the location of the D-rings.
-
Measure the distance between the D-rings and mark their exact spots on the wall.
? Use a spirit level for precision.
Step 3: Install the Wall Hooks
-
Drill pilot holes at your marked D-ring locations.
-
Insert wall plugs (for plasterboard or brick walls).
-
Secure the heavy-duty wall hooks using the provided screws.
? For solid walls, use a masonry drill bit. For wood, wall plugs may not be necessary.
Step 4: Hang Your Frame or Mirror
-
Gently lift and hang the frame so the D-rings sit securely into the wall hooks.
-
Adjust slightly to center or level if needed.
Common FAQs
1. Can I use this kit on drywall or plasterboard?
Yes! The kit is suitable for plasterboard/drywall. Use the provided wall plugs for added support. For extra-heavy mirrors, consider wall anchors rated for your item’s weight.
2. How close will the frame be to the wall?
The design keeps the picture or mirror flush and close to the wall, giving a modern, gallery-style look with no visible hardware.
3. What weight can this kit support?
When installed properly (especially into brick or wood), this heavy-duty kit can typically support up to 15–25 kg (33–55 lbs). Always check the wall strength and fixings if your item is near the upper limit.
4. What if my frame has a wire on the back instead of D-rings?
You can still use the D-rings. If your frame already has a wire, either remove it and use the D-rings for better flush mounting or keep the wire and use a different hanging method like a wall hook with a central hanger.
5. Can I hang my item without damaging the wall?
This kit requires drilling holes, but the wall damage is minimal and easily repairable. For temporary or rental situations, consider adhesive hanging solutions (though they are not recommended for heavy items).
Related posts
-
 Nail Free Picture Hanging Systems
Posted in: Picture Hanging Systems08/16/2023Picture hanging rails provide a sleek, horizontal mounting system that allows for versatile art placement without the...Read more
 -
 Picture Hanging Kit - Moulding Hook Steel Cable kit
Posted in: Picture Hanging Systems08/23/2023Picture hanging, while seemingly simple, is an art in itself. The moulding hook steel cable kit is your all-in-one...Read more
 -
 Hanging Pictures Using Gallery Rails without the Need for Nails
Posted in: Picture Hanging Systems04/06/2024Utilize high-quality gallery rails for sturdy support without the need for nails. Arrange artwork thoughtfully, using...Read more
 -
 How to Hang a Transparent Acrylic Poster Holder Using a 3meter J Rail Display System
Posted in: Picture Hanging Systems12/09/2024If you want a clean, professional way to display posters, brochures, or samples, the 3m J Rail Display System with...Read more
 -
 Why Professionals Choose Picture Hanging Systems Over Traditional Wall Hooks or Nails
Posted in: Picture Hanging Systems05/23/2025In the world of art display, presentation matters just as much as the artwork itself. Whether you're curating a...Read more


.jpg)
Leave a comment